MantelMount

How to Strategically Hide the Wires From the TV on Your Wall
A wall-mounted TV can be a showstopper in any home, yet too often a tangled clump of cords and wires can detract from your family’s new state of the art toy. Wires are one thing if they’re hidden behind a piece of furniture that’s the right size for your TV, but if you’re displaying a new flat screen smackdab in the center of your wall, finding a discrete solution for the TV’s wiring can take your flat screen from an eyesore to a focal point. Before you give up and decide to live with the frustration of a bunch of ugly power cords and electrical wiring cables spoiling your TV-viewing experience, let us assure you it’s not that complicated. In fact, there are some relatively easy solutions for when you’re looking for ways on how to hide cords and conceal those pesky wires from a TV. Using A MantelMount Wall Mount to Hide TV Wires With our state of the art counterbalance technology and automotive pistons, using a MantelMount pull down TV mount, like our MM540 Enhanced Pull Down TV Mount or our MM700 Premier Pull Down TV Mount, is easy for everyone to safely pull down a heavy wall-mounted TV into the perfect TV-viewing position. Plus, all MantelMount pull down TV mounts come with a wire and cable management system. MantelMount provides cable tie anchors that attach to the TV mount’s lifting arm and help organize and conceal the wires, making MantelMount an easy, one-stop-shop solution for hiding your TV’s wires. Want an even more seamless TV mount system that has its own capabilities to hide TV wires and cables, one that allows for your living room or family room to look as uncluttered as possible? Consider our MM815 Motorized Drop Down and Swivel TV Mount. How to Hide TV Wires on the Wall: 3 Simple Solutions But if you already have the mount or tv stand set up for your specific tv, and you still aren’t sure what to do with those wires, we’ve got a couple of ideas. As tv mounting experts, we can guide even the most seasoned tv watcher through the steps and modifications it takes to optimize every tv room. Using hooks for hiding wall mount TV wires A DIY project hack for packing away all of those pesky wires hanging from your wall mounted TV is to use plastic hooks or pegs, which are often found in hardware stores or online (think of places like Amazon or Home Depot). All you have to do is attach the hooks to the back edge of your furniture and anchor the cords to them. Once the cords are hooked in, they will seamlessly hide behind the silhouette of your furniture. Simply press each clip in place for around 30 seconds or so, and let the adhesive rest while adhered to your furniture for about half an hour, then it should be sticky enough to hold the weight of the wires. Are hooks or clips still even too bulky for where you’re placing the cords in conjunction with being in line with the back of the TV? Consider using velcro strips or zip ties, or a combination of any of the three items. This tip doesn’t just work when you are hiding cables when mounting a TV on the wall, but also when you need to arrange cords and cables at your work desk or simply need some decluttering in the kitchen or bathroom. One downside of this solution is that it is temporary, since the hooks, Velcro pieces, or zip ties, may need to be replaced from time to time. Also, this hack only works if you have a piece of furniture placed right below your TV that’s mounted to the wall. For those who do have a wall mounted television, you already have a built-in solution for how to hide wires from a TV on the wall. Using cord covers to hide wall mount TV wires A useful idea for hiding cables when mounting your TV on a wall is to use plastic cord covers that attach directly to the wall above it and conceal the wires. The cord covers can be purchased online or at your local hardware store. To successfully hide TV wires, the first step is to measure the wall between the base of the screen and the floor. This represents the length of wire you need to hide, so the card and cable concealer can be cut according to this measurement. Once that’s complete, firmly attach the raceway base to the wall with screws and snap the cover in place. Be sure that you’re equipped with all of the necessary tools you need to complete this operation such as a hacksaw, screws, and a screwdriver. You could also purchase some paint that is the same color as your wall and paint the cord covers for a more seamless look. Using this method, hiding wall mount TV wires is pretty labor-intensive and requires you to have some carpentry skills. Also, the success of this operation depends entirely on how well you execute it. After all, if the positioning of the cord cover is sloppy, it could be an eye-sore and a distraction that diminishes your home entertainment satisfaction. So, if you’re going down this road, do your homework! Placing TV wires behind the wall This solution is even more intricate than the previous one, but it is a surefire solution for anyone wondering how to hide wires from the TV on a wall. And by hiding the TV wires behind the wall, the cables will be out of sight and out of mind, for good. For this step of in-wall cable management, you — or a contractor — will need the following items: Stud finder Utility knife Recessed cable wall plate Once the above items are within arm’s reach, remove the TV from the wall. Then, use the stud finder to locate two stud-free panels on the wall. One of these should be behind where the screen ideally sits, and the other should be near the bottom of the wall or near the closest outlet. Once you’ve identified these, use the utility knife to make one hole on each of these spots, which is big enough to fit two cable plates, as well as feed the TV cables in and out of the wall. Once you’re done, you are all set with a seemingly “wireless” home entertainment set-up that is sure to wow your friends and family! Although using this method might be pleasing to the eye for any viewer, there are many cons to this option including, as mentioned before, requiring a significant amount of effort and skill. Also, this method is relatively permanent, so it isn’t the best option for people living in rented homes or apartments, since it causes damage to the wall. Think this option through carefully. However, this solution for how to conceal wires on a wall mounted TV is a great option for those who are going through a full renovation process of a home, or simply a living room renovation where the room is being gutted to the “foundation”. In this case, possibly consider this solution as the most tidy way to hide cables from the wall mounted TV and keep most TV cords out of the way for the foreseeable future. Once you’ve cleaned up those wires from your TV, you are one movie night or game day from achieving the perfect TV-viewing set up for your home.

How to Decorate a Mantel with a TV Above — Plus Ideas for Decorating Your Fireplace Mantel
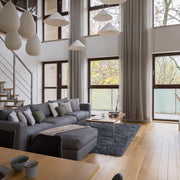
For those of us lucky enough to have a fireplace — or even better a working fireplace — autumn and winter are exciting times of the year. From Halloween decorating tips to sprucing up with greenery (like garland) and stockings for Christmas, you likely already have an idea about how you want to decorate your mantel for the holidays. But what about after the holidays? Styling a fireplace mantel with a TV above can be tricky. How do you create a visually appealing space without interfering with your TV viewing experience? Whether it’s a mirror, candlesticks, or artwork, finding the right decor for a mantel with a TV is key to maintaining style year-round. We’ve compiled some mantel decorating ideas with a TV above to help your living room or den look polished and inviting through every season! STANDARD FIREPLACE HEIGHTS & DIMENSIONS As the saying goes, “measure twice and cut once”. While this adage traditionally refers to sewing, it also comes in handy with fireplace décor ideas — especially if that DIY decorating requires drilling and making holes in the wall. Before you start brainstorming mantel decorating ideas with a TV above the fireplace, it’s important to understand some standard dimensions that can guide your decorating process. Fireplaces come in all shapes and sizes, from traditional wood-burning fireplaces with a classic mantelpiece to sleek modern designs with glass inserts. No matter the style, knowing your fireplace’s measurements is essential to creating a stylish and functional space. Typically, the mantel is 4.5 feet above the hearth, and most mantels are 3 to 6 inches wider than the firebox. By grabbing a measuring tape and noting the depth, length, and height of your mantel, you’ll have a clear idea of what will work for fireplace mantels with TV above decorating ideas. These measurements will help you find the perfect décor for a mantel with a TV, ensuring your home décor is balanced in size and scale. 3 FIREPLACE MANTEL DÉCOR IDEAS To decorate your mantel, start by taking some cues from the room you’re working with. What is the general style? Is it mid-century modern, with clean lines? Think, Mad Men. Or maybe you have a more traditional style with ornate wood pieces. Consider the room’s style, color palette, and focal point. For instance, if you have a fireplace mantel with a TV above, you might want to design around the TV as the centerpiece. Alternatively, you could shift the focus to a piece of art, decorative mirrors, or complementary furniture. The key is to balance the décor for a mantel with a TV so it enhances the room’s visual appeal without overwhelming the space. Using these fireplace décor ideas, you can create a space that reflects your personal style while maintaining a polished, cohesive look. IDEA #1. ARRANGE THE MANTEL WITH SEASONAL DECORATIONS Seasonal fireplace decor ideas are an easy way to keep your mantel fresh and festive all year. For spring or summer, brighten your space with lemons arranged alongside small glass vases filled with herbs like rosemary or thyme. These accents are not only visually appealing but also functional—use the lemons and herbs in your kitchen before they go bad! Need more inspiration? Check out our guide to spring mantel ideas for additional tips. In the fall, embrace warm tones with pumpkins, colorful leaves, and other harvest-inspired accents. For winter or Christmas mantel decorating ideas with a TV above, garlands, candles, and festive holders add a touch of holiday magic. Textured wreaths, pinecones, and seasonal flowers work beautifully with a white fireplace to create a cozy, inviting look. By incorporating seasonal touches, you can ensure your fireplace mantel with a TV above remains stylish and functional while complementing the room’s overall décor. IDEA #2. DISPLAY YOUR ART OR A MIRROR Another obvious above-the-fireplace design idea is a mirror or some art. This is to say, the mirror and your art pieces need to be the correct proportion with your mantel and hung at the correct height. Here are a couple rules of thumb to keep in mind: Your art or mirror should be two thirds the size of the mantel. For example, if your mantel is 72”, you need to find a piece of art that is 47” wide. Make sure you pick the right height and hang your art piece or mirror no less than 6” and no more than 12” above the mantel. If you’re opting for a tall or more vertical piece, don’t forget you can use the mantel as a shelf and forgo hanging all together. Once you’ve determined the proper dimensions of the piece of art you need, make sure you pick a piece with a frame that is cohesive with the rest of the furnishings and colors in the room. And remember, measure twice and cut once! IDEA #3. PLACE YOUR TV ABOVE THE FIREPLACE Like art, the first rule of thumb when placing your TV over the fireplace is to choose the right size TV. We have a very comprehensive guide about choosing the right TV based on surrounding furniture and where to hang it in relation to your seating area. While some people may balk at the idea of detracting from a classic focal point, like a fireplace, with a flat screen TV, the honest truth is, many households watch TV — an estimated 122.4 million, in fact. So why, if it’s such an integral part of home life, are we trying to hide it? If you place your TV above the fireplace, just make sure to pick a tv that fits and hang it at the right height. From there, we recommend displaying your TV on a MantelMount, like the MM815 Motorized Drop Down & Swivel TV Mount, so you can remotely-move it into the perfect TV-viewing position when you use it, and tuck it away when you don’t. Better yet, every MantelMount has the ability to come forward far enough off the wall to clear any décor items you pick to decorate! HOW TO DECORATE AROUND A FIREPLACE MANTEL WITH A TV ABOVE Decorating a fireplace mantel with a TV above requires a slightly different approach. If your TV is already mounted, focus on the space between the mantel and the TV to create a balanced, stylish look. For those yet to mount their TV, get ready — we have some great fireplace decorating ideas to help you transform your living room focal point. IDEA #1. DECORATE WITH A SMALL VASE AND WISPY BRANCHES Just because you have a TV above your fireplace does not mean you need to sacrifice on style. Arrange some wispy or thin branches in a low-profile vase and place it along the TV’s edge or in a corner. Branches of eucalyptus with gaps between each leaf won’t obstruct view, or you can try something leafless like dried flax, canary grass, or lunaria. IDEA #2. FRAME YOUR FIREPLACE WITH A FLOOR LAMP OR BOOKSHELF While not strictly an above-the-fireplace idea, adding a statement piece like a tall floor lamp or bookcase beside your mantel creates a striking focal point. For balance, pair it with a hanging plant on the opposite side or a low-profile option like succulents or pothos. If using an arched floor lamp, adjust it slightly to avoid blocking the TV while enhancing the room's symmetry and style. IDEA #3. SMARTLY DECORATE WITH ART Why do we say smartly? Because we wouldn’t necessarily recommend leaning a piece of art against your TV for the sake of decorating your mantel. Instead, try using the wall space to the left or right of your fireplace to hang some art. Remember, the center of your art piece should be about 57-60 inches from the floor. So if you’re hanging a series of stacked pictures of various sizes, make sure to place them accordingly relative to that eye-level height of 57”. There are a lot of ways to have fun with your décor even if you’re using your fireplace surroundings to display your TV. But hopefully some of these ideas will help you get started!

You Know How to Install a TV But What Do You Do When You Need to Take it Down?
There may come a time when you need to remove your tv from its wall mount. Whether that’s because you are moving apartments, buying a newer TV for the wall mount, or simply changing up the look of the room, the key to protecting your TV and your TV mount is to remove it correctly. While most install and uninstall directions are fairly easy to follow, there are a few straightforward tasks you need to do when safely uninstalling and getting the TV off the wall mount. Items You’ll Need for Getting a TV Off a Wall Mount When you’re looking to understand how to remove a TV from your wall mount, make sure there are a few items on hand so taking your TV off the wall mount is a quick, clean, and simple process. Here are a few items you’ll want next to you as you begin your task of removing your TV from the wall mount: A toolbox with tools that are needed for uninstalling, such as screwdriver A clean surface — possibly a broken down box, blanket, or a large plastic bag — for the front of the television to rest on while the mount is dismantled from the back of the television A box (if needed) for transporting the TV or for TV storage Installation manual (if available) How to Remove Your TV From a Wall Mount Once you’ve grabbed all of the necessary items, the next step is to remove the TV from the wall mount. Although this might not be a universal guide to getting a TV off a wall mount, this process is commonly what happens and what to expect. Step 1: Unplug and remove all cables Although it might be the simplest step, it might be the most important step. Remove any cables that are attached to the television and place aside. Although it may seem like one cable won’t hinder the process of getting your TV off your wall, it will likely be easier in the long run to have any extraneous items out of your way while handling an expensive piece of equipment. This is also an opportunity to keep your cables organized through a cable management system. If you’re moving into a new home or just relocating your TV to another room, keeping your cables together and untangled is a huge time saver when it’s time to remove a TV from the wall. Staying organized and strategically hiding wires and cables will make the process smoother, especially when you’re ready to set up your entertainment system in a new location. Step 2 (If applicable): Remove any locking mechanism If there is a locking mechanism that connects the television with the wall mount bracket, ensure that the locking device is released. This should guarantee that the television is able to be removed from the wall. Keep in mind that in most cases, the TV will have either an adapter or vertical braces attached to the back of it. Vertical braces are the most common attachment on the back of the TV. They are mounted to the back of the TV and locked to the mount so that the TV is stable and secured to the mount. When learning how to remove a TV from the wall, be sure to check if these vertical braces are securely unlocked before attempting to take the TV down. Failing to release the locking mechanism can damage both the TV and the wall mount, so be sure to carefully follow the manufacturer’s instructions. Step 3: Take the TV off the wall mount Once the cables are removed and the lock device is detached, now is the most sensitive step in the process. Since taking a TV off a wall mount can be tricky due to the weight of the television, make sure that you are focused on the task at hand. As a general rule, if your TV is larger than 40 inches, it’s usually too bulky and heavy to remove by yourself. TVs in the 50-65 inch range can weigh anywhere from 30 to 75 pounds, making it difficult to manage without assistance. If your TV is small and lightweight — typically under 32 inches — you may be able to handle the removal on your own, but even then, be cautious. For those larger mounted TVs, you’ll likely want to ask a family member or friend to help out with this step. Once the vertical braces have been unlocked from the TV mount, you will need two people to slide or lift the TV off of the TV mount. After the television is taken off the wall, gently place it on the spread out box, bag, or blanket for the next step to take place. Step 4: Remove the wall mount bracket from the back of the television As the television is resting on the clean and sturdy surface, and if you are still in possession of the installation manual, grab that before this step. The instruction manual would be another asset to have, just make sure if you do use it, to reverse the steps! With your screwdriver and any other applicable tool that you may need according to your wall mount or vertical braces, remove the screws that are attached to the 4 VESA holes on the television. If you’re a bit unsure of what parts might need to be removed versus those that are capable of staying on the back of the television, here is some information to keep handy when dealing with brackets and wall mounts. Step 5 (If applicable): Remove the wall mount from the wall Similar to Step 2, if applicable, the wall mount should be disassembled. However, if you are keeping the wall mount up, this step can be dismissed as the wall mount bracket from the TV is what is truly needed. If you are removing the wall mount, this can be the last step in the process. If the mount is installed to a wood stud application, you will need to unscrew the lag bolts that are used to secure the mount to the wall. Typically it is 4 lag bolts with two attachment points on top and two on bottom. If it's a simple drywall application, you will need to remove the drywall anchors from the wall, which will, as previously mentioned, also have the same attachment points. If the TV mount is attached to brick or masonry you will need to remove the anchor type for those applications. Once the anchors are removed from the wall, the mount should be ready to come off the wall. Luckily, after removing your TV mount, repairing drywall holes left behind is a simple and straightforward process. Whether you're dealing with small anchor holes or larger ones from lag bolts, there are easy steps to restore your wall to its original condition. Simplifying the TV Removal Process Now that you’ve learned how to remove a TV from the wall step by step, you can handle the task without stress. Whether you’re upgrading to a newer TV, relocating, or simply redecorating, removing a wall mounted TV carefully and methodically is the best way to protect yourself, your equipment, and your walls. Remember, using the right tools, following the manual, and getting help with larger TVs can make the process smoother and prevent accidents.

How to Mount a Heavy TV on the Wall for Those Who Love a Big Screen
We’ve said it before and we’ll say it again, televisions have come a very long way since they were first invented in the late 1920s. From better picture quality to more and better facets such as incredibly realistic flat panel (or flatscreen) pixel quality or welcoming the introduction to more organized cable management opportunities by way of lighting cord or HDMI plugs, TVs have made lots of advancements. One area, despite the evolution of TV screens getting to the point of being ultra slim, that can still be a difficult “thing” with TVs is the heaviness. Although you may not have an actual behemoth of a TV, like the Sony 34-Inch of the early 2000s that weighed a staggering 200 lbs, TV viewers still love to watch their favorite shows and teams on a TV that has a nice, big screen size, which often coincides with a heavy TV. Yes, as mentioned, TVs are more streamlined with the flat screen TV look and feel, but the weight of a particularly big screen can still pose a challenge when transferring a TV to a different room, packing it up for a move across town, or even mounting a TV on the wall. If you own a big screen TV that has a lot of weight to it, or you’re in the market for a new one, and you’re curious how best to mount a heavy duty TV (or, frankly, you have a heavy and large TV), what kind of equipment is needed and what type of mount you might need, read on! We have some answers for you as any TV-viewer should have the ability to watch a show, movie, or sports match at the viewing angle they desire, regardless of the weight of the TV. Can You Mount a Heavy TV On a Wall? The answer to this question is... it depends. Mounting any type of heavy TV up on the wall depends entirely on the strength of the wall to which you are mounting your television. If the wall you’re considering doesn’t have any studs, it’s better to be safe than sorry and to forgo mounting your heavy TV on the wall or, if you are capable and know what you’re doing, to use the appropriate anchor to support the TV’s weight. For instance, toggle anchors and toggle bolts look like regular screws, but they come with a butterfly toggle at the end. When placed in the wall, the toggle anchors work by attaching to the back of the drywall. Pulling at the screw or applying some external force has little impact as the toggle causes the whole sheet of drywall to respond, rather than just the crumbly center. On the other hand, screws are a dependable option great for hanging heavier items, like a full motion TV wall mount for a heavy TV, larger pieces of artwork, or a wall accessory like a hefty shelf. What you need to remember about screws though is that they should be drilled at least 1” into a stud. Testing Your Stud Material Not only do you need the right tools — such as the correct wall mount bracket, a drill, bolts, screws, and more than one set of hands — to safely install your TV to the wall, it’s also important to first test the strength of the studs and the wall before you begin the installation process. First, figure out what type of studs your home has. If you live in a typical single family home, odds are your home has wooden studs. On the other hand, if you live in a high rise in a city or in a newer (possibly more “architectural” type home), your building likely has metal frames which require different tools and instructions for mounting anything to the wall (including pictures, mirrors, and TV mounts). Not sure the make of your studs? That’s okay, there are a number of ways you can test and plot the layout of the studs in your home. Wood studs are typically heavier and can support more weight than metal studs. If you do have metal studs, however, there’s no need to despair, metal studs can still hold heavy objects if you use a bracket and mounting materials with the appropriate weight distribution for the item you’re hanging, whether that’s a TV wall mount for a heavy TV or a stunning, large piece of art. Considerations for a Wall Mount for a Heavy TV The first checkbox for when you’re looking to purchase a wall mount for a heavy TV is to guarantee the weight of the wall mount can sustain the weight of your television. If there is a discrepancy between the two, it’s best to continue looking for the ideal mount. When it comes to MantelMount TV mounts, our mounts have a range for the amount of weight each mount can support. Our popular 540 Enhanced TV Mount has a weight capacity of 90 lbs with the TV dimension being at most 80” diagonal. If you’re looking for a more visual representation of what the MM540 has to withstand and the specifications, we have a handy spec guide. If you have a slightly heavier television, our MM700 Premier Pull Down TV Mount has a weight capacity of 115lbs and the largest diagonal dimension at 90”. Is your heavy and larger flat screen TV used for movies, video games, and sports watching? If there is some weight that you can still add to the mount, even with the mounted TV, consider mount accessories that you’d like to incorporate to your viewing experience like a sound bar, a recess box, or a thin TV gap spacer. Mounting a Heavy TV to a Wall Mount How do you mount a heavy TV? Let’s just say, this is where a friend or family member will need to step in to help out. As mentioned, even though modern TVs may not be as heavy as the Sony 34-inch, flat screens are often top heavy. While a person may be capable of lifting the TV on their own, balancing it by themselves can be kind of tricky. Think about it: if you’re looking to utilize a wall mount for a 60 inch TV (check the VESA pattern on the back of the TV for measuring!), it is going to be about 52 inches, or rather, a little over 4 feet. Therefore, we recommend having at least two people mount the TV and possibly a third to be the “director” to ensure the TV is not slanted or “off” while being attached to the mount’s wall plate. If you decide to buy a MantelMount TV mount for your heavy TV, the process of hanging your mount on the wall is quite simple. We have installation guides and addendums at the ready for anyone who purchases one of our mounts. If you’re still struggling and using the guides, take a brief watch of this installation help video. Regardless of installation guides and videos, you’ll want to make certain that you prepare the space around where you will be placing the wall mount, by not just finding the stud to use, but clean up the area so you have enough space to work with. Additionally, similar to removing a wall mount, have all of your tools and equipment readily available so the installation process is as simple as it can be. Here are some of the tools you’ll need or want handy just in case... Painter’s tape Tape measure A level Concrete anchors and lag bolts — these items come in every MantelMount box Concrete screws and washers Drill with a hammer drill function Concrete drill bit Socket adapter, ratchet, or rubber mallet Step 1. Locate the studs in your wall The most efficient way to find studs in the wall is to use a stud finder. These can easily be purchased at your local hardware store or online. Once you have your stud finder, hold it to the wall you wish to use to display the TV. If the stud finder beeps while scanning the wall, this indicates there’s a stud under the drywall. You can also test by knocking lightly along the wall with your knuckles to hear for any hollow spots — these are spots to avoid. Once you’ve confirmed you’ve found studs, mark the stud’s center with a pencil. Step 2. Ensure your measurements are level You’ll need to grab your helper(s) for this step. Once you’ve indicated where your pilot holes will be placed, have a friend or family member hold the bracket’s slats over the marks. Place your bubble level on top of the bracket and ensure it sits level. If not, you may need to adjust one of the pilot holes slightly up or down so your TV will be mounted straight. It’s important to verify this before drilling because once you start creating holes, it can be very difficult to troubleshoot without causing additional damage to the wall. Step 3. Mark and drill your pilot holes To properly mount your flat screen, you’ll have to create drill holes that are the correct size for your TV mount. Typically, a ¼” drill will work, but this can vary depending on the unique specs of your TV mount and the TV. As the saying goes in sewing, “measure twice and cut once”. Remeasure your TV, the bracket, and the mount, and double check that the drill hole marks you’ve made on the wall line up with your television mount’s slats. When all of your measurements look correct, drill your holes into the studs. Step 4. Attach your bracket to the wall and the TV to the bracket Clear the drill dust out of your freshly-made pilot holes, add washers to the end of your screws, and secure the bracket to the wall through the bracket slats. Attach the TV mounting wall plate to the back of the TV and, with a partner, line up the TV mount with the bracket on the wall according to the manufacturer’s instructions. Still feeling uncertain or uncomfortable about installing the wall mount for your heavy or large tv by yourself with the help of a friend)? MantelMount has professional installers ready for that purpose.

How High to Mount a TV in the Bedroom
For many households, having a TV is an integral part of any room of the home. Whether there’s a television found in less obvious, but high traffic rooms — who doesn’t love to watch some game shows on the TV while cooking up dinner in the kitchen? — or solely dedicated to the living room and bedroom only, TVs can be found everywhere in a house. However, here, we are focusing on the bedroom. We’ve addressed before those people that do not believe the bedroom is a place for a TV, whereas others have a bedroom TV as a requirement for a nighttime retreat. Before we dig more into the considerations of having a TV in the bedroom, it must be noted that a bedroom TV isn’t the same as having one placed in another room. For example, in the family or living room — where you are most likely to be seated — the height of the TV mount is probably different from that in the bedroom, where you are most likely to be watching TV while lying down. That said, mounting a TV in your bedroom is a task that requires some planning, such as deciding the proper height. This can be a challenging task. Making a well-thought out decision when it comes to how high you should mount your TV in the bedroom is important for your enjoyment of the viewing experience in addition to your health. In terms of the angle and height of a TV bedroom, a poorly-mounted TV can be a literal pain in the neck, including causing eye strain and headaches. A challenge that you can face when deciding the correct height for your TV in the bedroom is the viewing angle. Most people lie down flat on their beds while watching TV, but some roll over sideways or use pillows to prop themselves up. These are just some of the factors you have to keep in mind when deciding how high you should mount your TV in the bedroom. So, how can you make sure you are watching TV at the optimal viewing angle while also being as comfortable as possible? We look at some items to think of before you mount a TV in the bedroom. Items of Consideration When Mounting a TV in The Bedroom Size of the Room An important factor to keep in mind when deciding how high to mount your TV is the actual size of your bedroom. This will make a difference in deciding the viewing distance and height of your TV mount. Do you have a smaller room, a lot of windows, or larger sized pieces of furniture that might hinder having a good TV viewing height while you’re laying down? Understanding your room layout in addition to the size of the room and other factors will influence not only where the TV is placed on the bedroom wall but the perfect height in comparison. The best rule of thumb for the height of the television is often dependent upon the area between the couch and the TV. With a bedroom, as the size of the room is often smaller and the 8-1 rule cannot be followed as strictly, simply keep in mind the room’s size, the TV size, and furniture size (which, we hit on next). Placement of Furniture As mentioned, the overall design and layout of the room will also play a role in deciding how high the TV should be mounted. Furthermore, the placement of larger furniture items, such as the placement and direction of your bed, where a bedroom credenza, dresser, or armoire is located, and possibly a small seating area with a bedroom chaise, can affect a TV’s position and the optimal height where the TV will be mounted. When you’re considering the wall your TV will be mounted on, keep in mind not just the wall type — we have blogs to guide you on mounting TVs on drywall, stucco, and plaster as well as blogs on mounting a TV on stone and mounting a TV on brick — but also where you will feel most comfortable with the placement of the bed and the placement of the TV on your wall. Size of the TV The dimensions of your TV and how they interact with the dimensions of your room and your furniture are other players in this situation. An extra-large flat-screen TV in a medium to small size bedroom — with a king size bed — sounds like a recipe for disaster. The best height to mount the TV in that situation would be as high as possible, so you can see how the size of your TV matters while you are making this decision. However, if you have a smaller room with a smaller sized bed, it might help your case to purchase a larger TV. Keep in mind, though, that the TV mounting height and room size in which you mount your flat-screen TV can also make the TV appear bigger or smaller than it is. So, make sure you keep in mind the dimensions of your bed and your bedroom when you are picking out which TV to buy. Should you Mount a TV in the Bedroom? Before taking the plunge, it's important to think through whether you really want to mount a TV in the bedroom. Doing so isn’t a random interior décor decision; rather, it comes with accompanying lifestyle changes. For example, if you’re a bachelor living in a studio apartment, a TV in the bedroom might make sense for you, but married couples or couples with children might prefer to put the TV in the living room, where it is accessible to the kids. After all, in this case, mounting a TV in the bedroom might be a bad idea, as kids love TV and your alone time with your partner will definitely take a hit. Once you have thought about it, and you’re sure that a TV mounted in the bedroom is the right choice for you, you can go ahead and start the above mentioned steps and get ready to mount your TV. But, wait!What if there was a way to avoid the headache of all the measurements and decisions when it comes to the proper height to mount a TV in the bedroom... especially one that will allow for your perfect viewing angle that comes to eye level? Think full-motion TV mount. Think MantelMount! Our revolutionary TV mounts are expertly crafted and made with your complete viewing pleasure in mind. It gives you total control and flexibility in deciding what you want your home entertainment experience to be. The cutting-edge automotive gas pistons and patented counterbalance technology allows you to adjust the height, direction, and angle of your flat-screen TV according to whatever is most comfortable for you. It is an adjustable, full-motion TV mount that allows you to dive into your favorite movies and TV shows, without having to deal with the common pain points of a standard, fixed TV mount. What’s even better? Our newest TV mount, the MM815 is a motorized TV mount, allowing you to have the wall mounted TV experience that you have with every other MantelMount, but with a remote to control the drop down and move up movement.With MantelMount you can mount your TV at an approximate height from your bed, and then MantelMount’s many patented and adjustable features will give you the freedom to decide how best to watch your TV. It makes pulling down a large flat-screen TV off the wall a piece of cake, and further allows you to swivel it left or right as well... whether manually or remotely. Time to transform your bedroom: have that perfect home theater experience as you get into a comfortable viewing position, lie down, laze around, and watch your favorite shows and movies from the comfort of your own bed!

Technology and Apps to Help You Mount Your TV at the Right Spot
Is it straight? What about now? Perfect. Wait, it’s crooked? We’ve all been there, right? We followed the exact instructions included with our TV mount, only to find that something was off. Did you know there’s now an app, or I should say apps, to make your life easier when it comes to mounting a TV and rearranging your living room for the optimal TV viewing experience? Below, we’ll explore some great apps you can use to help with your living room furniture layout, mounting TVs, and more. Tech and Apps for Living Room Spaces As you prepare your space for your TV, there are a few apps that can help you have a more seamless experience during the set-up phase. Apps for TV Mounting One of the most helpful apps and tools to assist you in set-up are apps for TV mounting. These include: iHandy Carpenter: It can assist with proper measurements in a room and wall and includes a plumb bob, a surface level, a bubble level par, a steel protractor, and a steel ruler, all of which can be used to ensure your mount stays level and is properly spaced before mounting. Bubble Level: If all you need is a bubble level, there’s an app for that. Stud Finder: A stud finder app is another handy tool if you don’t have one available at home. MantelMount Installation Calculator: Having the incorrect TV mount for your TV can be a huge disappointment during the installation phase. Our installation calculator factors in screen size, TV weight, VESA compatibility (shown in TV manual), wall space height compared to TV height, and mantel depth to ensure you purchase the correct MantelMount TV mount for your TV. MantelMount Video Installation Guide: Watching someone else install a TV mount can improve your experience tackling the job yourself. Watch our installation video, or similar videos available online, for specific tips for installing TV mounts. And check this article for installation tips depending on the type of wall you have – from drywall, stucco, and plaster to brick or stone. BILT: Similar to watching a video, the BILT app is a 3D interactive tool that takes manuals and presents the information in a 3D visual format so you can zoom in, readjust your angle, and see how to install TV mount accessories and TV mounts more effectively. If all else fails and you want some outside help, check out these tips about what to do when you’re ready to hire a pro to mount your TV. Apps for Room Layout and Design Another consideration to make when mounting a TV is wall placement and furniture layout. If you’ve decided on the optimal place to mount your TV but the furniture doesn’t seem to be working, you can use a living room furniture layout app to help you envision a reconfigured space before having to move everything around again and again. MagicPlan: This can help you experiment with different furniture arrangements based on your floor plan. Room Planner by Ikea: Enables users to design and visualize your living room space layout with iKea furniture specifically. Amikasa: Creates different room layouts and various furniture arrangements so you can decide on the optimal seating arrangement and TV placement before you begin mounting your screen in your space. Houzz: This app has a number of features, one of which includes inspiration and tools you can use for room design, specifically a feature to visualize products in your space using AR. Roomstyle 3D Home Planner: Roomstyle will let you create 3D room designs so you can experiment with furniture placement. Sweet Home 3D: Another helpful app that will allow you to arrange furniture and design room layouts in 3D. Technology for Optimizing Your TV-Viewing Experience Finally, after you have mounted your TV and rearranged your home with the help of a room furniture layout app, you can continue to optimize your TV-viewing experience with more technology. Some great tools you can use for this include: Logitech Harmony Hub: It centralizes the control of your home entertainment and smart home devices. Sonos Sound System: Having the right sound system can make all the difference and improve your TV-viewing experience. Philips Hue: Smart lighting can sync with your TV so when a movie or show is solemn or even action-packed, the lighting will adjust to match the mood of the room. Amazon Echo Show: This will provide voice control for smart home devices, including your lighting and sound systems, so you can take charge of the controls with a simple command. Samsung SmartThings: An app to connect your entire home, including your entertainment area, through smart home products. Purchase Your TV Mount Today

Getting Ready to Move This Season? Here's How to Safely Pack and Transport Your TV
It should come as no surprise, with change in the air, that spring and summer mark the beginning of move-in seasons when leases end and homeowners list their homes for sale. In fact, according to USA Today, nearly 70% of people in the United States move between April and August. If you’re one of those Americans with a looming move-in date, we may not carry all of the answers to make the transition as smooth as possible, but we can weigh in on one very important aspect of your move: how do you pack and safely transport your TV from point A to point B during a move? Read on to discover our practical packing tips for protecting your TV. Safely Remove the TV From the Wall Mount or TV Stand We’ve written extensively about some of the safest and best ways to mount your TV. Whether you’re looking for a renter-friendly solution or a strong TV mount that can hold up to brick walls, stone walls, or drywall, stucco, and plaster walls, MantelMount offers a smooth, counterbalanced pull down TV mount that works in any room and for every television-viewer. But what happens when you’re preparing to move, planning a renovation, or you’re simply replacing an old flat screen TV with a bigger (and likely better) new TV? In any scenario you find yourself in, the first step is to safely remove your TV from its existing mount and carefully store it for whichever journey lies ahead. To get started uninstalling your TV, it might be wise to grab a “spotter” as flat screens (particularly large ones) can be heavy and cumbersome. Once you’ve found someone to assist you, removing your TV from a wall mount is rather simple. Step 1. Place packing supplies, including a blanket or soft material, on the floor It’s best to do this step before you remove any wires, or the TV itself, because once your hands are full, lifting your flat screen out of the mount, you won’t have a chance to put down any protective material. Find a soft blanket or a sheet of bubble wrap to lay on the floor near the TV. This will protect the screen when you put the TV face down to remove the bracket. Since you’re at it, we recommend you grab any other packing supplies you think you might need and place nearby. That way — whether you need your TV’s original packaging, any styrofoam pieces for creating a secure packing quarter, or a separate box for cables, HDMI cords, and the like — you have everything at arm’s length and don’t have to go scrounging for the materials. Step 2. Take a picture of your wire set up & unplug everything This is an important step and one that can be often overlooked, so make sure you don’t just scan past it. If you have a soundbar, video game console, or a cable box, remove those cables and wires that feed into the back of your TV — but before you do, take a picture of your assembly for easy installation when you’re ready to set up your tv again. If you haven’t already done so with this TV mount installation, consider cable management to be part of the installation once you’re completed with the move. Having cables and cords managed in a tidy way will make the TV aesthetic look better and incorporates entertainment safety. If you do have cable management involved with this TV mount setup, make sure to secure the wires just how they are, together, and then place them to the side to clear your path so you don’t trip as you pull the TV off of its mount. Step 3. Check for a locking mechanism on the TV mount Before you lift the flat screen off of the mount, check for any locking mechanisms that may hold the TV in place. If you start to lift the TV out of the mount and you feel resistance, stop lifting and check the back of your TV. You’ll need to use a screwdriver to safely unlock your television. Be aware that the safety locking mechanism comes into play with installation as well as when uninstalling or changing televisions. The safety bolt is used to keep the arm in place so that it doesn't swing upwards under the tension of the gas springs. If a television is being removed or adjusted, the safety bolt will need to be used. Step 4. Tilt and lift your TV This is the step that may require you to enlist the help of another. With a firm grasp on the bottom of your flat screen, tilt your TV toward you while making sure the top section of the TV remains against the wall. If you’re struggling to keep the top of the TV angled toward the wall, have another party guide the top part of the TV up and away from you. Once you’ve discovered the correct angle, the bracket on the back of the TV should easily lift out of the mount. Step 5. Unscrew your TV bracket Gently lower your TV — face down — onto the blanket on the floor. This is an important measure for protecting your TV’s screen. With the right screwdriver, unscrew the bracket from the back of the TV and set to the side for proper packing and securing for storage. Step 6. Remove the wall mount Now all that is left to do is unscrew the metal wall mount from the wall and fix any holes. With your screwdriver, take out the screws and remove the mount from the wall. Patch up any holes with spackling and touch up the wall with paint. Now that your TV is safely off of the wall or removed from its TV stand, you can start making preparations for packing your flat screen into storage or getting it ready for a move. How to Pack a Flat Screen TV for Moving You might want to hang on to that bubble wrap and that blanket from the previous steps because the second step in figuring out how to pack a TV for a move requires gathering all the necessary materials. Here are our recommendations for packing material to get your TV, unbroken, from point A to point B: The original box and packing material or a flat screen TV box Foam corners Bubble wrap A blanket Stretch wrap Packing tape If you aren’t sure exactly which material you’ll need, think about how you intend to move the TV. Are you transporting it yourself in a small car or van or U-haul-type truck and you’ll figure out how to finagle the way to make the TV flat and secure? Are you using a professional moving company with a large box truck, one in which the TV box may stand in an upright position? Are you simply relocating to a new home a few blocks away and are going to walk and carry the box? Do you have access to the original packing material fitted to your specific flat screen or will you need to purchase standardized material? However you intend to transport your TV, we can walk you through safely packing your flat screen to make sure it’s safe before, during, and after your move. If you have the original box When it comes to how to pack a flat screen TV for moving, we will always recommend placing the TV in its original box. The original box is designed with the specific dimensions of your TV and will provide the best support during transportation. Having the original box may also mean you still have the styrofoam inserts (unless you already threw them away when you bought the TV!) meant to protect corners and prevent the TV from rocking inside the box during your move. This is the safest way for moving a television and preventing screen damage. Place the foam inserts properly around the TV Slide the TV into the original box Tape the box to secure openings and prevent the TV from sliding out during transportation Place a “FRAGILE” label on the box If you’re packing a flat screen in a moving box If you don’t have your TV’s original box, the next best option is to purchase a moving box designed for a flat screen. You can get these at any Home Depot, a local hardware store, or a moving company. Many flat screen moving boxes are adjustable and come with the foam corners to protect your screen. All you need to do is secure the box’s openings with packing tape. Wrap the TV in bubble wrap Pad the corners with foam or a soft material Slide the TV into the moving box Tape the box securely Place a “FRAGILE” label on the box If you’re transporting a TV without a box While this is the least secure way for transporting a TV, we get that life gets in the way. Not everyone has access to their TV’s original box and if your local hardware store or Home Depot is sold out of the TV box size you need, you can safely get your television from one home to the next with some strategically placed bubble wrap. Start at the top of the TV and wrap 2-3 layers of bubble wrap around the screen Place soft material, like foam or blankets, around the TV’s corners and secure that material in place Place a moving blanket on the floor and put the TV face-up in the center Pull the corners of the blanket to the center of the TV’s screen to safely wrap the television Use stretch wrap to add another protective layer around the blanket from top to bottom and then again from side to side Keeping Your TV Safe During Transport The final step within the lengthy process of packing and moving a TV is to keep the precious object safe while in the moving truck or your car. TVs are weight-balanced and built to sit upright, so be careful as laying a flat screen flat in a moving truck could cause internal damage. Additionally, place the TV box away from the walls of the moving truck as they will likely shake and vibrate during the move. Any jostling or bumps could crack the delicate screen. It is likely best to place the TV box between two larger, sturdy objects, like a mattress or the flat back of a couch, to keep the TV upright and safe from shaking. If you’re transporting a large TV, say anything larger than a 65-inch model, it’s best not to force a TV of this size into a small, compact car. Again, we recommend putting larger, delicate items in a secure place in a moving van so your TV and other valuables arrive safe and sound. For more TV safety moving tips or TV room inspiration, check back in with our blogs here at MantelMount — we’re always discovering new and creative ways to make TV-viewing better.

The Best Way to Mount a Flat Screen TV
If you’re a homeowner, or have a little experience with DIY-home projects, mounting something, anything really, on a wall might be a piece of cake. And, usually, it is. However, mounting a flat screen TV — an elaborate, fragile, expensive, and heavy glass object — onto the wall is (or can be for some!) a different experience. Have you been clamoring to update your living room to make it a home theater? Or are you desperately seeking out a better TV-viewing experience, like the ones that incorporate a tiny bit of home improvement to them?You’re in luck because we are going to walk you through the process of successfully mounting a flat screen TV on the wall, step-by-step. Gathering Your Materials Stud finder Tape measure Level Drill Pencil Wire molding (or in-wall power extension) Your television Step 1: Finding the Right TV Wall Mount Understanding TV Wall Mount Types It all starts with picking a superior TV mount. To a large extent, the quality of this project depends on how strong your TV mount is.A run-of-the-mill, fixed TV mount can get the job done if your expectations are low, but your experience will be rather limited. Since it is a fixed TV mount, a lot of time, thought, and careful measurement must go into deciding where exactly to go about mounting the flat screen TV. This is because this type of TV mount offers viewers zero adjustability due to it’s “fixed” position, an even bigger issue if your plan is to wall mount a flat screen TV high on the wall, such as above the fireplace. Looking for a TV mount to make your flat panel TV really stand out and not limit the viewer experience in any way? MantelMount is a revolutionary TV mount designed to assure complete TV viewing pleasure. Our cutting-edge automotive gas pistons and patented counterbalance technology lets you easily adjust the height, direction, and angle of your flat screen TV to whatever is most comfortable for you. It is an adjustable full-motion TV mount that allows you to dive into your favorite movies and TV shows without any of the pain points common with a standard (or fixed) TV mount. Say goodbye to neck pain, eye strain, headaches, or any other trouble you may have from an ill-installed TV using a fixed TV mount.What’s more, if you're one of the many now mounting a TV above the fireplace, most MantelMount models even include a patented heat sensor handle, ideal for mounting a flat screen TV above the mantel. The handle not only allows for safe and easy TV pull-down, but it turns bright red when the temperature of the TV environment hits 110°, alerting you that it is time to turn off the fireplace and/or stow the TV in the raised position for the well-being of your electronics. Selecting The Right Mount for Your Flat Panel TV Have you ever heard of VESA? Even if you don’t know what it is by name, you’ve certainly seen it on a television. VESA mounting standards are a set of guidelines set by the Video Electronics Standards Association to guarantee compatibility between monitors, TVs, and mounting systems. Defining the dimensions and spacing of mounting holes on the back of the TV, the standards make it easier to securely mount a TV with a variety of mounting brackets, TV stands, and mounting plates. Step 2: TV Mount Installation Preparation Now it’s time to get prepared and undergo the installation! The first thing you’ll want to do is to grab your stud finder and find the stud in the wall. If you’re looking for more information on how to mount a TV on your wall, but it might be a tricky type of material? Take a look at our other blogs such as How to Mount a TV on Drywall, Stucco, and Plaster, How to Mount a TV on Brick, and How to Mount a TV on Stone. If your flat screen TV weighs under 80 pounds, using just one stud to mount it on the wall should be okay with many TV mounts. Larger units, however, require some additional support that may require two or more studs. It's best to check the weight of your TV and stick to the recommended stud suggestions of your chosen TV mount. Next use your viewfinder to locate the appropriate number of studs. If using a MantelMount TV mount for hanging a flat screen TV over the fireplace, these installations typically require two wooden studs no further than 32” apart, but MantelMount does offer a single stud adapter accessory for single stud use-cases as well. Step 3: Undergoing TV Mount Installation The next step is understanding where your wall mount will live on the wall, while having an understanding of where the TV screen will be once the TV is brought down from its resting position on the wall. So what should you do? Raise your wall mount against the wall to see how high you want to attach it. Take your time with this as you must be taking into consideration the articulating aspect of the wall mounted TV. Once you’ve decided where on the wall you’d prefer your television, mark off the measurements carefully on the wall with a pencil. Once you are certain of where your TV wall mount bracket marks should go, use your drill to make pilot holes in each of the decided spots. Pro tip: use a drill bit that is a little bit narrower than the size of the screws or bolts you are using to mount your TV mount on the wall. This will ensure a tight, firm grip. If you are trying to wall mount a flat screen TV over a fireplace — or a difficult-textured wall, like stone or brick — MantelMount is your best choice due to its patented features that have been specifically designed for hanging a flat screen TV above the fireplace. Step 4: Attaching the Wall Mount to the Wall The first part of this step should be fairly simple. Attach the TV wall mount to the wall with the screws you received with your kit. Make sure you have the right wrench, screwdriver, or any other tools to get this done. The second part of this step is a bit more harrowing, especially if you have a new TV, you have a larger television (think: 85 inch TV or larger), or your TV is in pristine condition, despite it possibly being older. So what do you need to do? Gently lay your flat screen TV down, screen-first, on a soft surface. This is so you can attach the other half of the mount bracket to the back of the TV. Step 5: Cable Management Decisions Although the tough part of the installation is over, Step 5 means you have to go about deciding how to make all of the tangled cords and cables disappear. Cable management is likely a necessary step if you have children or pets (or if you have a clumsy adult in the household) that might get caught up in a tangled mess. With MantelMount, our cable management options include items like cable anchors and hooks, so you can thread your wires and neatly organize them along the lifting arm of the mount. Want even more of a clean and low profile look with your TV mount? Get your cords out of the way and into the wall so your viewing experience isn’t mired by a mess and invest in accessories such as a Cable Routing Box to de-clutter the cords. Get inspired from happy MantelMount customers by reading how their experiences were transformed with TV mounts and accessories. Step 6: Reveling in your Newly-Mounted TV Give yourself a pat on the back for getting this far without a hitch. Now, it's time to add the crowning glory — actually mounting the TV on the wall — to this project. This should be the easiest part of the entire process. However, for safety purposes, ensure your bracket is correctly in place before having two people steady the television for the TV installation portion to the wall mount. It is important to make sure there are two people so the TV doesn’t get in a wonky position as it’s mounted.Voila! Mounting a flat screen TV on the wall made easy with a foolproof, six-step process, brought to you by MantelMount.

Ask the TV Mount Experts at MantelMount: How to Attach a TV to an Existing Wall Mount
The evolution of televisions has come a long way. With superior sound and picture quality, modern TVs provide home theater-quality from the comfort of the living room, or even the backyard. This quality also applies to TV accessories like smooth swivel, tilting, articulating, and full-motion TV mounts and booming sound bars. So, what happens when you do need to buy a new TV? First thing you should do is to take a gander at our New TV Buying Guide. Then, once you have purchased your new flat screen TV, you’ll have to understand what type of TV mount you require. Here comes the hang up: you already have a full motion TV wall mount. Should you connect your new (likely expensive) television to your old wall mount? If so, how do you attach the TV to an existing wall mount? Is it better in the long run to get rid of the old TV wall mount and purchase one to start fresh? Although you can reuse a TV wall mount by attaching a TV to an existing wall mount, what is the best course of action? Use an old wall mount or buy a new one? We help you sort out those questions, here. Can You Reuse a TV Wall Mount? Let’s not beat around the bush with this one: you can reuse a TV wall mount. But the question we often get is, should you? Many wall mounts, whether it’s an old TV wall mount or a newer version of a wall mount, are VESA compliant. The Video Electronics Standards Association maintains standards across the display industry such as VESA mounting hole distances, the number of holes, and even the hole arrangement on the back of the TV display. When deliberating if you want to reuse a TV wall mount, the first thought to come to mind should be if the wall mount is usable with your specific TV. If you have had a TV wall mount for a while, for the safety of you and your family, audit the wall mount. By auditing the old TV wall mount, this is what we mean: Are there any parts of the mount that are degraded, rusted, or appear weak? What does the mount hardware look like, and do any screws or bolts need updating? Is the mount structurally sound and sturdy in the wall? If your current wall mount needs replacing due to wear and tear, it would be prudent to look at options for a new mount, and MantelMount is a great place to start. Every MantelMount pull down wall mount or our motorized wall mount option uses counterbalance technology and lightweight alloys to guide your TV into the best viewing position. Our MM540 Enhanced Pull Down TV Mount has a VESA compatibility up to 600mm and fits the vast majority of TV sizes. Are TV Wall Mounts Universal? Before deciding to keep or ditch your old TV mount, it’s fair to ask yourself if all TV wall mounts fit all TVs. Depending on if you have a new, or newer, television, it may be difficult to use your old TV wall mount because not all TV wall mounts are universal. Even though not all TV wall mounts fit all TVs, there are many TV brackets that are universal. However, although some are universal, that does not mean all TV wall mounts are universal. And because not all TV wall mounts are universal, keep in mind the VESA guidelines and your TV’s size and screen size. If you would like to know more about VESA interface standards, read through our helpful guide for more information. If you do decide you are happy with your current wall mount, keep these steps in mind when you attach a TV to an existing wall mount: Verify the VESA standards of your television Compare the approved VESA TV standards to the existing wall mount Match the back of the television to the brackets on the wall mount and, if necessary, modify the wall mount brackets through widening or shortening the length. Grab a screwdriver and tighten up any loose screws and bolts Mount the television to the wall mount Choosing a MantelMount Wall Mount If you decide to purchase a new TV wall mount rather than keeping the old one, because of the MantelMount wall mount lifetime warranty policy, you might not need to buy another. Luckily, MantelMount products are used in a variety of ways, such as mounting a curved TV, mounting on a brick wall, a stone wall, drywall, stucco, or plaster walls, or even as a baby-proofed, wall mounted entertainment center. Do you already have a MantelMount and want to upgrade? Maintain that same streamlined, low-profile look of your living room (or wherever you choose to place the TV mount) with the addition of our latest MM815 Motorized Drop Down and Swivel Mount. It’s a DIY-ers mounting dream as it sustains large, heavy-duty televisions, and its operation is simple for most to use in the family. If you need assistance with installing your new MantelMount TV wall mount anywhere in your home, call our friendly and knowledgeable customer service professionals who are able to help you get your wall mount fixed and ready to use in little time.

Build the Ultimate Backyard Today & Spend More Time Outside: 6 Useful Tips for Mounting Your TV Outdoors
It will come as no surprise that the past couple of years have been on improving living spaces and focused on home improvement. From creating office nooks to relaxing spa updates in the bathroom, three-fourths of Americans painted, retiled, and upgraded their homes to make at-home activities a little easier and more fun. But home interiors weren’t the only areas to see an influx in improvement projects. Sixty-one percent of homeowners also tackled projects outside — transforming backyards into auxiliary dining rooms, gyms, even living spaces. Many homeowners created these living spaces by adding in a gazebo or pergola, creating a welcoming space that allows for some partial sun in the summer, while also being safe enough to bring an outdoor heater next to the “living room” for wintertime fun outside. And this trend of great outdoor living spaces doesn’t seem to be going anywhere soon. One of the key elements of any living space is a great TV, but not all TVs can be used outside. Find out how you can build the backyard of your dreams with these tips for mounting a TV outdoors. Buy an Outdoor TV or Place an Old TV in a Weather Resistant Cabinet Sometimes, upgrading the inside of your home presents an opportunity to upgrade the outside as well. For one, it could be a great time to upgrade your TV. If you’re in the market for a new TV for your living room, consider installing the old TV outside. In the likely event that the old TV isn’t weather resistant or weatherproof, you can place your indoor TV in a weatherized cabinet. TV cabinets and covers come in different grades of weather resistance and waterproofing. For instance, a cover with an IP55 grade offers protection from water and dust. An IP44 grade, on the other hand, will only protect against particles larger than 1mm and may not be suitable for weather conditions like rain and snow. If you’re an experienced DIY-er, you can build your own weatherized outdoor TV cabinet and then use a MantelMount TV wall mount to get the job done. When installed correctly, our AB40 Bracket serves as a necessary horizontal adapter, providing a 90-degree bridge between the mount's wall plate and the TV mount lifting arm. This allows the wall plate to lay flat on a horizontal surface such as a large shelf or inside a recessed alcove — like your new weatherized TV cabinet! Using MantelMount, you'll even be able to pull the TV outside of the cabinet and down to a lower eye-level if you like! Mount Your TV in a Covered Patio Whether you’re using an old TV or purchasing a new outdoor TV, protecting the screen will be of the utmost importance. If you are installing a standard TV outside you may want to consider placing the TV under a covered patio. This will provide protection by giving the television full shade while also giving you the feeling of a home living room vibe within your semi-outdoor space. For even more protection for your TV, or if you mount a TV in an area that is uncovered, there are a few options for weatherized TV shields available to buy that are on the market. Standard indoor TVs have certain environmental requirements to operate correctly. Most indoor TVs need to be kept in environments with low humidity — between 35 and 50%. This makes most TVs unsuitable to mount on an exterior wall of your home. If you end up installing and mounting a TV outside that was made for indoor use, keep in mind any warranty terms and conditions. This will likely bring peace of mind so if something shorts out or something ends up not working properly, you are able to properly address the issue. With that being said, installing an outdoor TV gives you more placement flexibility. In which case, you may just need to accommodate the strength and material of the wall before mounting. Mounting into a brick wall, for example, requires the wall to be able to bear 5 times the weight of your TV. Sunlight and inclement weather conditions will need to be another factor to consider if you can’t place your TV in the shade or may be close to any precipitation. Consider an Intentionally-Made Outdoor TV Wall Mount We’ve established that you’re looking for that home theater-like experience... but outside. There’s something to be said by following our tips like keeping cables short and having a great surround system, but it will likely be unfortunate if you are unable to mount the TV. That’s why, with our WeatherMounts by MantelMount, you can enjoy the lapping of the waves in the pool from the breeze at dusk, the crackling of the fire pits, and your outdoor television showing your favorite TV show (or movie or sports game) while the TV is mounted on a specially-made outdoor TV mount. With all of the parts and hardware of the mounts made from Marine Grade 316 Stainless Steel, you can be rest assured that you’ll receive all of the same benefits of a MantelMount with our WeatherMounts. Pick an Exterior Wall That Faces South Once you decide to build a TV cabinet or purchase a high quality cover, you next need to decide where to place your TV in your backyard oasis. You may already have the perfect exterior wall in mind, but if it’s in direct sunlight, you may never even see what’s on your screen — especially if you’re appropriating an indoor TV for outdoor use. Outdoor TVs are built with higher levels of brightness than standard indoor TVs. A typical outdoor TV has an NIT count of between 1000 to 2000. Compare that with the standard NIT count of an indoor TV, 250 to 350, and you can see why sunlight can have such an impact on an outside TV-viewing experience. If you can’t place the TV in shade, mounting a TV on an exterior wall that faces south is the next best thing. Why? By placing an outdoor TV with its back facing south, the sun will be behind the TV throughout a majority of the day. This will reduce glare that you might experience from direct sunlight. Think About Speaker Placement Second to a high quality picture is high quality sound. Consider the type of sound experience you want to create. (Remember: the sound will carry outside!) Is it surround sound in which the soundscape moves from front to back? Or a more front-focused sound with height and width variation, like in 9- and 11- surround sound systems? 9- and 11- Speaker Channels To create a 9- and 11- channel experience, place waterproof external speakers 40-45° off-axis from the seating area. Install the speakers approximately 8ft off the ground and tilt the speakers down. This will introduce height to your soundscape. Then, place another set of speakers 60° off-axis low on the ground or relative to the viewer’s seated height. This will distribute sound on a horizontal plane. Together, the combination of high and low speakers placed at an angle create a captivating sound experience. Creating Surround Sound We’re all familiar with the theater-like quality of a surround sound system. To achieve this, place speakers 25-30°, 90-110°, and 135-150° off-axis. This will create a 360° sound experience for immersive viewing. For sound systems that aren’t mounted, you can search for speakers that resemble rocks and place them on the ground around a garden. This will integrate your sound system into the surroundings, allowing you to enjoy your garden by day and your favorite films for weekend movie nights. Keep Cables Short Just as it’s important to baby proof TV wires, it’s also important to protect cables from the elements and, naturally, you may even be wondering how to run cable to an outdoor TV. Antenna and CAT cables are typically used in outdoor TV setups due to their length. However, most TVs will require this type of wire to feed into an HDMI converter. If you want to fortify these cables from the elements further, feed them through pipe coverings or conduit. Another effective way to run cable to an outdoor TV is to use a drip loop. Instead of running cables in a straight line, like with an indoor TV, drip loops place the excess wire in a circle. This gives water a chance to drip off the wire onto the ground, preventing water damage. Creating the best TV viewing experience is central to MantelMount’s creed. That’s why every MantelMount TV wall mount and WeatherMount is built with safety and quality standards to create the best TV-viewing experience and environment. For more tips like these check back for more helpful TV mounting advice from the experts at MantelMount.

MantelMount's VESA Guide: Everything You Need to Know About VESA Mounting Standards & Interface Patterns
If you’ve ever bought a TV or a new TV mount, you may have encountered the term “VESA” during the installation process. Depending on your experience installing that TV, you may either love VESA standards or they still leave you confused, scratching your head and asking yourself “what does VESA mean, again?” Wherever you are in the TV mounting process, understanding VESA patterns can help you pick the right TV mount and follow best practices for installing that specific mount on your wall. To learn more about some of the terms you’ll encounter throughout the process, check out our helpful guide on VESA interface standards. What Is the VESA Mounting Standard? Most popular TV, display, and monitor manufacturers comply with a set of standards created by the Video Electronics Standards Association (VESA), which is known as the Mounting Interface Standard of Flat Display Mounting Interface. The VESA-compliant display mounts also follow these interface standards. Originally published in 1997, the FPMPMI Standard is now widely used by manufacturers. It has helped increase the sale and utilization of flat-panel monitors into new markets and applications at a low cost. This standard broadened to include the full range of flat displays in order to provide similar application growth and economic benefits to the entire industry. Why Are These Standards Necessary? Standardization in any industry can be extremely helpful for cutting down costs and increasing production. As it relates to VESA mounting standards, these guidelines are also necessary to help consumers that match their TV or monitor display. For instance, the VESA pattern on the back of your 44” TV would allow you to mount it with the MM340 Standard Pull Down Mount so you can always place your TV in the perfect position. Additionally, VESA standards ensure safety, creating weight capacity guidelines to hold the size and weight of your TV. Finally, the standards are kept so that display manufacturers can assure product compatibility with one another. So a TV of one make and size easily fits with a TV mount of another. What Are VESA Patterns? While the VESA standard is a universal guide for manufacturers to regulate the production of a piece of equipment, VESA patterns are the 4 mounting holes on the back of the TV or monitor and their configuration. For example, a 100 x 100 pattern means there are screw holes arranged in a square on the back of the display 100mm apart. If you are looking for and need to measure your VESA pattern, the dimensions can be found at the back of the display, in the user’s manual, or a simple manual measurement — the horizontal and vertical distance between those holes is calculated in millimeters — can be performed if it’s not already marked. How to Measure VESA Size If you add a VESA mount to your monitor or television, it can allow you to hang and reposition your display. This allows you to readjust your flat screen to hang at eye-level and view your TV from a comfortable position while seated. The center position for the hole pattern allows the mount to hold heavier displays by reducing torquing force that is applied to the mount. You can easily find a mount that is appropriate for your flat screen or monitor’s weight by measuring your VESA pattern. This will help you understand which mount will be compatible with your screen so you can purchase the right one and install it correctly on your wall. When measuring for VESA size, keep in mind that the most common standards are VESA 400 x 400 for displays up to 60 inches, and VESA 600 x 400 for bigger screens. Remember, if 100 x 100 mm means the screw holes are arranged in a square, 100mm apart, that means VESA600x400 have horizontal holes that are 600mm apart and the vertical holes are 400mm apart. Here are a few other things to keep in mind when measuring your TV’s VESA pattern: Measure the horizontal distance between the centers of the left and right holes Measure the vertical distance between the top and bottom holes If you’re measuring in inches, convert to millimeters (1 inch = 25.4 mm) If you are measuring VESA patterns in inches rather than millimeters, follow this VESA guide reference: VESA Pattern (mm) Approximate Inch Equivalent VESA Pattern (mm) Approximate Inch Equivalent 75 x 75 3” x 3” 300 x 300 12” x 12” 100 x 100 4” x 4” 400 x 400 16” x 16” 100 x 200 4” x 8” 400 x 200 16” x 8” 200 x 200 8” x 8” 600 x 400 24” x 16” 200 x 300 8” x 12” 800 x 400 32” x 16” The 3 Most Popular Variants of the VESA Mounting Standard VESA Flat Display Interface Standard (FDMI) defines the standards for displays such as flat TVs and monitors. Of which, the most popular versions are listed below: VESA MIS-D, 100/75, C These compliant displays are equipped with either a 100 x 100mm or 75 x 75mm square hold pattern. M4 screws are used to attach the mount to small displays that weigh no more than 38lbs (17kg). VESA MIS-E, C This type of compliant displays are equipped with a 200 x 100mm rectangular hole pattern. M4 screws are used to attach the mount to mid-sized displays that weigh less than 50 lbs (23kg). Manufacturers provide MIS-E VESA mounts with an adapter kit in order to convert an MIS-D mounting plate, allowing it to hold an MIS-E display as well. VESA MIS-F, C These are the compliant displays that are spaced in 200mm increments (400 x 200mm and 600 x 400mm). Some displays may deviate from the standard, such as a 300 x 300mm hole pattern. M6 or M8 screws are used to attach the mount heavy displays, with screens greater than 31 inches in size. The Objectives of FDMI The main reasons for having a standard of flat displays is three-fold, including: To define a set of standards for a range of displays with viewing areas ranging in size from 102 mm (4 inch) to 2,286 mm (90 inch) diagonal To support a range of mounting options, such as desktop, wall, overhead, mobile, and specialty mounting applications To define a set of corresponding standards that describe interfacing mounting pads, wall mount brackets, and other mounting equipment provided by manufacturers Key Features and Benefits of FDMI When it comes to FDMI features and benefits, what’s good to have and identify as an aspect that is necessary? Here are 6 benefits: Can be used for a broad range of display sizes and applications Meets specialized needs and applications Provides ergonomic benefits, space savings, and a broader industry utilization Offers low-cost installation in a broad range of applications Provides access to all markets and applications for displays Economic benefits for all, including the manufacture, sale, and use of displays Final Takeaways The VESA Interface Standard is adopted by most TV manufacturers. Whether a TV wall mount is fixed, swiveling, tiltable, or articulating, the VESA mounting size is always the same: horizontal x vertical distance in millimeters. Manufacturers offer a complete range of high-quality mounting appliances that are compatible with the standard, to ensure a perfect solution for any TV or VESA size. If you’re curious to know what size mount you need for your TV, you can use MantelMount’s Install Calculator so you can be secure in making the right choice for your TV.

4 Considerations to Make When Choosing the Ideal TV Size For Your Space
Your TV doesn’t need to be the focal point of your room (if you don’t want it to be) but it should fit. Picking a TV that’s too large for furniture or too small for the wall upon which it rests can be an eyesore and it can also create an unpleasant TV-viewing experience. That’s why, when choosing the right TV size, there are a few key considerations to take into account to make sure it fits with your space and it makes sense for your viewing habits, lifestyle, and more. Not sure where to get started? We’ve created a few helpful graphics and references that will put everything into perspective so you can find the TV size that works best for you and your space. 1. Consider Television Sizes and Dimensions When you purchase a new piece of furniture, finding its dimensions are about as straightforward as measuring for length, width, and in some cases, depth. This makes it relatively easy to determine whether or not a particular piece of furniture will fit where you envision it in your space. However, the same cannot be said for a TV. When picking the right size TV, it’s important to understand standard TV sizes and their true dimensions. Televisions typically use a diagonal measurement, from one corner to the opposite corner. What does that mean? Take a 55-inch TV, for instance. That 55-inch television is not actually that wide. The length is closer to about 47 inches. Understanding the diagonal screen size of your TV will allow you to more accordingly plan your room size, furniture placement, and viewing experience desired. Below we have listed some of the most standard TV sizes and their measurements to get a better sense of how to choose the right TV size for your room. Popular TV Sizes & Dimensions TV Sizes Width (Inches) Height (Inches) 32" 28" 15" 40" 35" 20" 42" 37" 21" 49" 43" 24" 50" 44" 25" 55" 48" 27" 60" 52" 29" 65" 57" 32" 75" 65" 37" 80" 70" 39" 85" 74" 42" 2. Think About Your Lifestyle & TV Viewing Habits It’s safe to say that whenever buying a new TV, creating a better TV-viewing experience is top of mind when shopping for the many options available. That’s why it’s important to consider your lifestyle and your TV-viewing habits in order to pick the right TV size for your family and the ways in which you enjoy watching TV. To get started, think about where you like to watch TV. Do you prefer to watch TV in bed? In which case, you might want to pick a TV that’s going to be the right proportion above your dresser. Do you prefer to have an almost home theater-like immersive experience watching TV in the living room on a large screen? If so, you might want to look at larger TVs that fit your wall. If you’re looking to understand more about how your favored TV-viewing position matters and how other watchers view TV, take a glance at our blog on what the best position to watch TV is. Additionally, it might provide more insight into where to place your TV: is your TV placement better in the opposite corner of the room from where your seating area is so it can be nestled away when guests come over? Or would you want to show off your TV, thanks to the clean look that the television gives to your space? What’s more, you’ll have to think about your living situation. Are you a renter and can’t drill into walls? Then finding the right size of a TV for a media cabinet would likely be your best bet. Or, maybe you have active little ones running around, and baby proofing the TV area may be of high priority, in which case, you’ll need to find a TV with a comparable wall mount like a pull down TV mount from MantelMount. 3. What Size TV Fits For Your Room and Your Standard Furniture Sizes? Whether you’re mounting your TV on the wall or you’re placing it atop a piece of furniture, you’ll want to consider the furniture’s size and dimensions when choosing the right TV screen size. As a good rule of thumb, a TV’s edges should never go past the edges of the piece of furniture it is sitting on or placed above, and should actually be about 3- to 4-inches shorter than the furniture’s edges on either side of the TV. Picture this: If you have a media console that tops out at 60 inches long, it would be a good idea to choose a from anywhere between a 50-inch TV and a 55-inch TV (and that means, with the aforementioned guide for knowing the size of a flat screen TV, the choice would be to go with a standard 60-inch TV). This will leave you plenty of space to fill up the rest of the console’s top with décor pieces, pictures, or TV gadgets like a sound system or game console. Learn More About Standard Furniture Sizes Credenzas & Buffets Credenzas, traditionally, sit in an office opposite a desk but they have found their way into modern living rooms as a storage piece below a TV. The credenza tabletop is typically 30"-32" high and 18"-22" deep. They vary in length, but any credenza reaching at least 70 inches (or longer) will be large enough to fit most standard TV sizes. Media Cabinets & Sideboards Media cabinets and sideboards are similar to a credenza in that they are about 20"-22" deep, however, sideboards are typically shorter than credenzas, reaching only about 60" in length, in which case, a tabletop or mounted TV should not exceed 65". And remember, the TV measurement should be taken diagonally to get the actual size of the TV but also the full width of the TV to make sure it will be secure, if it is placed on top of the media cabinet. Tables & Desks While dining table lengths vary depending on the number of people they can accommodate, desks usually land anywhere between 24"-60" long, with gaming desks often being found a bit longer. If placing a TV on top of a desk or mounting over a desk, consider the dimensions of the TV as the width should be a minimum of 3" shorter than the edge of the table to prevent overhang and achieve the right proportions. End Tables & Consoles End tables and consoles are smaller than both standard credenzas and sideboards. Consoles are tall but shallow, only about 12"-14" deep; they will be more suitable under a wall mounted TV. End tables, on the other hand, are not as wide as console tables and sideboards, measuring about 16"-22" wide. To counter the length of a TV mounted over an end table, place a large houseplant or another substantial décor piece on the floor next to the end table and past the edge of the TV to create balance. 4. Reference the Size of Your Old TV There are any number of reasons why someone might be in the market to find a new TV, but before you throw out your old one in the interest of replacing it with something bigger and better, it might be a good idea to consider everything about your old TV that you liked and disliked to lead you to a final decision. If you liked the size of your old TV, you might look for one in a similar size. This will likely narrow your choice down to different brands and help you rule out companies that don’t offer a TV in the size you’re looking to buy. If picture quality was an issue, you might want to put your money toward a TV with HDR image capabilities and upgrade to an OLED or QLED. Not sure about what type of TV you might need to enhance your entertainment and TV-viewing experience? We have this TV Buying Guide that will be of help when you’re seeking to purchase a new television, regardless of if you are looking for a TV set, a massive widescreen TV for the living room, or simply need a small TV for mounting in the kitchen. For those that hold picture quality as the top check in the checklist, understand more about the science behind eye-level TV viewing. Choosing the right TV size for your space and creating the ultimate TV-viewing experience may take a little consideration, but it’s all worth it in the end. If you’re curious about mounting your new TV or which wall mount is compatible, look no further than MantelMount. Our friendly experts are always available to field questions about TV mounting and we’re happy to help you find the right MantelMount to fit your budget and space.

Still Not Sure About Buying MantelMount? We Answer Some of Your Most Frequent Questions
Televisions were invented nearly 100 years ago — in 1927, to be exact (though the first televisions were sold in 1929) — and one could say we’ve come a long way since then. When TVs were first rolled off factory floors, there wasn’t a huge demand for them as most households listened to the radio. Slowly but surely, the TV trend took off and by the 1990s nearly every household had a television — and a designated spot for that TV in the living room. Today, nearly 122.4 million homes in the United States have a TV and this prevalence has led to a rise in the demand for furniture — and TV mounts — to house that TV. Depending on the layout of your home, whether it’s open concept or small and compact, you may have to get creative about where you place your TV. At MantelMount, we do not believe that placement should come at the expense of your TV-viewing experience. That’s why, when we created MantelMount, we sought to make a TV mount that could serve as a versatile solution for any home, TV size, and viewing preference. Here, we tackle some of the most frequently asked questions about TV mounts to ease any skepticism out there, and to highlight all of the wonderful features of our award-winning TV mounts. FAQ #1. CAN YOU PUT A MANTELMOUNT OVER THE FIREPLACE? Before MantelMount, the answer might have been “no.” Now, thanks to MantelMount Pull-Down Mounts, the answer is a resounding “yes”. In fact, it’s kind of our thing, you might say, and we’ve written about the merits of mounting your TV above the fireplace, in the past. Placing a TV above the fireplace is a popular mounting option! Not only is it often the only open wall space in a room, it places the TV in the focal point of the room — which can work well from an aesthetic perspective if you can get creative with your decor. Mounting your TV this high though can create a little bit of a tradeoff: When you mount your TV above the fireplace, it is generally well above eye-level, which is not the optimal viewing angle for TV-watching — think about the last time you were forced to crane your neck to watch a movie in a movie theater. However, MantelMount brings your TV down to eye level. In fact, it lowers the TV 24 inches from the mounted position (26 inches with the professional version). This creates the perfect viewing angle as well as eliminating the neck and back issues that can arise. And it allows you to utilize that nice big space above the fireplace, or even an open space high up on a wall. Further Reading Everything You Need to Know About Mounting a TV Above the Fireplace Why You Should Place The Bottom Third of Your TV Screen Below Eye-Level How to Decorate a Mantel With a TV Above: Plus Decor Ideas for Above the Fireplace Other FAQs “How will lowering my TV improve the viewing experience?” “Will MantelMount fit my TV and wall space?” FAQ #2. WHAT IF I WANT TO LIGHT A FIRE WHILE I’M WATCHING TV? When we created MantelMount, the TV-viewing experience was always top-of-mind for our customers. That’s why we patented heat-sensing handles that begin to glow red when the temperature goes above 110° Fahrenheit (43° Celsius). At that point, you can either put the TV back up or put out the fire. So while we do not encourage customers to have their tv in the lowered position when the fireplace is on, these heat-sensing handles will ensure that the safety of your TV — and of your family members — is paramount. For MantelMount TV mounts, note that temperature sensing handles come with selected models, including the MM540 and MM700, whereas the MM815 is equipped with a visual temperature sensor. Further Reading How High Should I Mount a Flat Screen For the Best TV-Viewing Experience? How to Mount a TV on a Brick Wall How to Mount a TV on Uneven Stone Other FAQs "Why do the handles on MantelMount TV mounts turn red?" “Why is MantelMount much safer than other mounts?” FAQ #3. DO I NEED TO GET A PROFESSIONAL TO INSTALL IT? If you’re already familiar with MantelMount or this is your first time seeing it, our TV mount installation manual may look more detailed in comparison to others, but is easy enough for any at-home DIYer to accomplish. The installation process is specific to our MantelMount TV mounts but simple enough for the payoff that our world-class mounts offer. If you are even the least bit handy, you can install it yourself in about 60-90 minutes. However, if you don’t want to be bothered with the installation, there are any number of professionals who can help you install your MantelMount wherever you want it. Further Reading Tech Guru Dave Taylor Reviews the MantelMount MM540 Enhanced Pull Down TV Mount The Experts at MantelMount Discuss How to Mount a TV Without Studs Here’s What to Do When You’re Ready to Hire a Pro to Mount Your TV Other FAQs “Are there install manuals and videos?” “Where can I find a professional installer or dealer?” “Can MantelMount be easily installed on brick or stone?” FAQ #4. ARE MANTELMOUNT TV MOUNTS EXPENSIVE? There are mounts you can buy for under $100. There are mounts that are even under $50. But they have serious issues. One large issue with more cost-effective TV mounts is that they are often mounted above the fireplace, and yet, those TV mounts are likely not able to adjust positions to the optimum viewing angle. Even the lower-priced TV mount models that do move vertically are, by and large, poorly constructed from inferior materials. One of the biggest incentives of purchasing MantelMount TV mounts is that they move up and down, so you can mount the TV above the fireplace. Plus, with our latest MM815 Motorized TV mount, it’s easy to move your TV up or down with the press of a button! Purchasing a MantelMount TV mount allows you to have peace of mind, knowing your investment will hold up. How? With MantelMount, our patented construction combines high-quality automotive pistons with lightweight alloys. That means it will last — and it will protect the investment you’ve made in that beautiful, new flat screen TV. The bottom line is, do you really want to hoist your $700 flat screen up onto a $100 TV mount? It's a good idea to secure your investment and have peace of mind. If you aren’t sure which MantelMount is correct for you, check out our Collections page for a price comparison between our most popular models, with the MM815 Motorized Drop Down and Swivel TV Mount as a front-runner. Further Reading Build the Ultimate Backyard Entertainment Center With MantelMount Renter-Friendly TV Mounting Tips for Those Who are Moving Out or Moving In Here’s How to Safely Pack and Transport Your Expensive TV Other FAQs “Do you offer pay later options?” “Do you have a money-back guarantee?” FAQ #5. HOW DO I USE TV MOUNT ACCESSORIES? From a recess box to wall plate covers, MantelMount has specific TV mount accessories that will enhance your TV-watching experience. By incorporating accessories that create a more robust encounter while watching TV — whether it means it’s through aesthetic purposes or through more technical elements — you can create an atmosphere that elevates the focal point of your living room: the television! For instance, those out there looking to enhance their viewing experience through technical elements (we see you audiophiles!), a product like a soundbar mounted under your TV is a great item to have. The MantelMount SKB00 Universal Sound Bar Adapter Kit is the product you need to make watching TV shows, movies, or sports even more enjoyable. If you’re looking for more visual enhancements surrounding your television, using items such as a recess box or TV wall mount covers can create a more streamlined aesthetic experience. Our RB100 Recess Box works for the MM340, MM540, MM700, and MM815 mounts and allows for a flush TV-to-wall storage environment. Meanwhile, the MantelMount WPC00 Wall Plate Covers — used for the MM340 (covers are included with the MM540 and MM700 TV mount orders) or replacement MM540 covers — hide the wall surface mounting hardware pieces, creating a more seamless look of the TV and wall. Further Reading Common TV Bracket & Mount Terminology Give Your Entertainment Space a Clean Look with Cable Management Other FAQs What's involved in upgrading from an installed MantelMount (340/540/700) to the MM815 Motorized Mount? What accessories do I need? What is the SBK00 Universal Sound Bar Adapter Kit? ANY OTHER QUESTIONS? You might still have some questions about MantelMount and that’s great! We’re happy to help wherever you are in the buying process. If you still have questions, contact us at 800-897-9755 or contact@mantelmount.com or head over to our FAQ page for more in-depth answers to a variety of questions.

How to Mount a TV on Drywall, Stucco, and Plaster
There are many reasons to install a TV in your home, or even on your covered patio, but if you’re unsure of how to secure such a heavy object to your wall, especially as surface treatments vary from home to home, this guide is for you. It is possible to anchor a TV wall mount to any type of surface; you just need the right tools to ensure your system is installed properly and that your wall can handle the weight of your television. Mounting a TV on Plaster Walls vs. How to Hang a TV Wall Mount on Drywall The biggest difference you’ll discover between mounting a TV on plaster walls vs. hanging one over sheetrock are finding the studs. Keep reading to learn how to locate the studs behind each wall, what to do if you don’t see them, and which anchors to use for a TV mount on plaster vs. drywall. Plaster Wall TV Mounts Before doing anything, understand what material was used to construct your home. Sometimes plaster is placed over brick and sometimes it’s placed over lath (narrow boards hung horizontally over the studs). When you screw into a plaster wall, you could be hitting plaster, lath, and a stud, or plaster and brick. This is critical to know so you use the right type of anchor. To find this out, try knocking on the wall. When you knock on the plaster, does it sound solid or hollow? Brick will sound more solid while lath will sound more hollow. In this section, we will primarily address how to hang your system to plaster and lath. For plaster-brick walls, please refer to our article, “How to Mount a TV on a Brick Wall.” Step 1: Locate the Studs While there are ways to hang a TV wall mount without a stud, we recommend fastening to a stud whenever possible to ensure it is the most secure. To locate studs behind plaster, you will need a strong magnet that you can drag along the wall to find them. The magnet will be able to detect where nails were used to attach the wood lath to the studs. If you have trouble, locate your electrical outlets for the room. These boxes are attached to studs. Drag your magnet back and forth above the outlet box to determine if the stud is located to the left or right. From there, measure out 16-24 inches, as is typical of stud spacing in home construction, to determine where the next post is located. You can use your magnet in this next area to verify the stud is there. Step 2: Drill the Initial Holes Once you have located your studs, drill a pilot hole through the plaster and into the wood. If you cannot locate the stud, drill your initial holes where you want the TV to hang. Plaster is very thick and can crack more easily, so be careful as you drill. Step 3: Secure the TV Wall Mount Using Lag, Toggle, or Molly Bolts For anchoring to studs behind plaster and lath, use lag bolts. If you are connecting your TV to a plaster wall without a stud, use a toggle or molly bolt, keeping in mind that a molly bolt can hold up to 50 pounds. Keep in mind that when purchasing and using a MantelMount TV mount, they must be mounted to studs or a structural part of the wall and cannot be mounted to simply just drywall or plaster. Drywall TV Mounts Drywall is the most common building material homeowners encounter when placing their TV. For it, follow the steps listed below. Step 1: Locate the Studs There are a lot of great stud finders on the market these days. Having one in your home is helpful for hanging anything — from TVs to light fixtures and more. Use your stud finder to locate the posts. If you have trouble or do not want to purchase a stud finder, you can use a similar method mentioned in the previous section: measuring along the wall from your outlets. While there is likely some metal used along these studs, you can also gently knock along the wall to verify a post is there. If it sounds hollow, you’re knocking on drywall. If it sounds solid, you’ve hit a stud. Step 2: Drill the Initial Holes This will be most important if you have found the stud, as it will make it easier for the screw to attach to the wood. Step 3: Secure the TV Wall Mount Using Lag, Toggle, or Molly Bolts For drywall, lag bolts are the best anchors to screw into studs. For positioning without a stud, use toggle or molly bolts. Because this material is much thinner than others you might screw into, we highly recommend attaching your mount to at least one stud for additional stability. If that’s not possible, consider using our SSB40 Single Stud Wall Adapter, as it serves as a replacement for the included mounting wall plate when it can’t reach an existing stud placement. This will help carry the weight of the TV with more ease and give you more places to add anchors for a sturdy mount. Can You Put a TV Mount on Stucco? If you love spending time outside or hosting events, you may want to install one of our WeatherMounts on your covered patio. In doing so, you may encounter uneven stone or stucco. Since we have already addressed how to attach a TV to uneven stone surfaces, we wanted to share instructions for hanging a TV on stucco. The first thing you’ll want to do before securing anything to stucco is determine if the stucco is covering wood or concrete. To test, knock and see if it sounds hollow or solid. If hollow, it has been placed over wood. If solid, it has been used on concrete. For Stucco Over Wood Step 1: Locate the Studs To do this, look on the other side of the wall you want to hang your TV on and find the studs. Measure edge to edge to see where each one is. Return to the stucco side to match the measurements and mark the studs. Step 2: Drill the Initial Holes To drill through the stucco, you will need to use a concrete drill bit or hammer until you reach the wood. Once there, switch to a normal drill bit. Step 3: Secure the TV Wall Mount with Lag Bolts To secure the system to the stucco, use a lag bolt that will screw through the hole you just drilled, through the stucco, and into the stud. For Stucco Over Concrete Block Step 1: Drill the Initial Holes Because there are no studs within the concrete block, you can skip straight to drilling the holes once you have determined where you want your TV to go. Use a concrete or masonry drill bit to screw through the stucco and concrete block. After you have made the initial holes, you may want to add some sealant for extra protection against leaks, especially if you live in an area with a lot of rain. Step 2: Secure the TV Wall Mount with Concrete Anchors Using concrete bolts, attach your system to the stucco-concrete wall. How You Can Use MantelMount on Any Wall Treatment Our team wants to equip you with what you need to install your MantelMount TV wall mount. To do so, we have included standard lag bolts for drywall with each of our mounts, as well as concrete anchors with lag bolts. While many of our customers install these mounts themselves, if you’re in need of help, we would recommend hiring a professional to set up the mount and TV over concrete, as this is going to be the most difficult element. Once you have the tools you need, check out our installation guide with general instructions for installing our mounts: MantelMount Installation Tips from MantelMount on Vimeo. Then check out the installation guide for your own mount model, as shown below and also found on our FAQs page: MM340 Standard Mount: Install GuideMM440 Standard Mount: Install GuideMM540 Enhanced Mount: Install GuideMM700 Premier Mount: Install GuideMM750 Pro Mount: Install GuideMM815 Motorized Mount: Install GuideSBK00 Universal Sound Bar Kit: Install GuideRB100 Recess Box: AddendumSSB40 Wall Adapter: AddendumSBXL Above TV Sound Bar Adapter: AddendumAB40 Horizontal Adapter: AddendumGS60 Thin TV Gap Spacer: Addendum Ready to buy? Purchase Your TV Mount Today

Give Your Entertainment Space a Clean Look with Cable Management
Whether you have a home theater room or a makeshift home theater in the living room, there is one obstacle we all face when creating that perfect entertainment space: managing a mess of cords. Cords are critical to the functionality of our televisions, speakers, gaming systems, sound bars, and ultimate home theater technology, but figuring out the best cable management system so you can hide those wires from visitors, animals, and kids can be challenging. When you mount your TV, you’ll find you can actually hide cords more easily so you create a safer space for your kids, animals, and physical health with the right TV-viewing angle. All you need is the right solutions for managing and hiding dangling wires when you mount your TV, so you can focus on watching your favorite game, movie, or TV show without wires to distract you. 3 Reasons Why You Should Put Cable Management Ideas Into Practice 1. Managing Cables Will Make Your Space Look Neat and Tidy Most of us have been there when the Christmas tree lights come out of storage and family members need to be separated as voices get raised and frustrations rise. Light cables are similar in entertainment cord and cable management speak in the way that once the cords get intertwined, it can be a bug bear to get them undone. As more and more households come to the understanding that Christmas tree lights are easier to deal with when managed, the same goes for entertainment center cable management. 2. Organizing Cords and Cables is Safer Back to the holiday light scenario, many of us can understand the safety of factors that go into cords strewn about the floor leading to outlets. Any child or adult can be found to put their foot in a bad place and have it twist improperly thanks to an erroneous cord. Plus, to keep animals from chewing on random cords, organizing cables and cords from entertainment equipment is much safer versus the alternative. 3. Cable and Cord Management makes Home Entertainment More Effective and Efficient We’ve all had those moments when the TV doesn’t turn on or the video game console is glitching and it needs a restart or, as an IT person likely would say on the first instance, “Did you turn it off and on again?” To ensure the correct cable is being pulled or taken out of the outlet to then put back into the outlet, cord management allows for some efficiency; especially if the efficiency includes small flags or tags on cords to identify what item they belong to. Once you realize how much simpler life will be once your entertainment center’s cords, you will want to take advantage of MantelMount’s products that minimize distractions and will make your space look neater. 5 MantelMount Products to Minimize Distractions Pull Down TV Mounts All MantelMount pull down TV mounts come with cable tie anchors that attach to the TV mount’s lifting arm, so you can organize and conceal wires easily behind your TV. Shop Now Cable Routing Box One of the best methods of cord maintenance is running them behind the wall. Our cable routing box was designed to route signal cables through a wall behind a MantelMount and blend in with the background using the included covers. You can eliminate the hassle of fishing wires through the wall with this large conduit accessory. Shop Our EC43 Cable Routing Boxes Recess Box Another great way to hide wires and your mounting hardware for a cleaner look is with our recess box. The recess box is easy to install and provides a super flush TV-to-wall storage space, concealing the mounting hardware within the wall and accompanying wires and cords that have been attached to the mount’s lifting arm. Shop Our RB100 Recess Box Universal Sound Bar Adapter Kit In most newer homes, outlets are uniquely positioned on the wall where you might mount your TV, so hiding the cord to the TV itself isn’t the problem. However, as you add speakers and soundbars, that’s where more challenges come into play. With our new SBK00 Universal Sound Bar Adapter Kit, you can mount your soundbar on the bottom or the back of your TV so the wires can remain hidden behind the screen. Shop Our SBK00 Universal Sound Bar Adapter Kit Wall Plate Cover If you didn’t opt for the recess box, you may still want to cover the TV mounting hardware on your wall. That’s why we created our wall plate covers, which slide over the hardware to hide them from view. Shop Our WPC00 Wall Plate Covers Learn More About Our MantelMount Products

How to Make Your Living Room Feel Like a Home Theater
Most dream homes include a home theater. And with so many streaming services to watch and sports games to enjoy, creating a home theater makes sense. But if you think creating such a space in your own home isn’t feasible, consider saving some money with a little DIY. With the right home theater system setup, you can create your own living room home theater. What Do You Need for the Best Home Theater System Setup in Your Living Room? There are several key elements that make up a home theater — many of which you probably already have, and a few you’ll want to invest in. By incorporating each of these living room home theater ideas, you can turn your living room into an entertainment oasis. You will need: Home Theater System Equipment Living Room Home Theater Furniture Furniture Arrangement Home Decor Home Theater System Equipment The most important feature of your renewed space is the home theater system you use. Here are some products you’ll need for your home theater system setup: Television It would be hard to create the perfect entertainment oasis without a TV, which is why it is first on our list. While some people might want a projector screen and projector, a TV is going to offer the clearest picture and fit more easily into your space. If you don’t have a TV you want to use for your new theater — maybe you want a larger size than what you have now — check out our guide to buying a new TV and then look at this list of the best TV deals happening now. TV Wall Mount Large, flatscreen TVs don’t always fit within entertainment centers like they used to due to their screen size, and by not purchasing an entertainment center you can save yourself quite a bit of money. If you get a large enough screen, the best option is to have a living room with a mounted TV. You can purchase a MantelMount pull down TV wall mount so you can adjust the screen to the optimal TV-viewing angle, which we’ll explain in more detail later. Here’s more information on which TV mount to buy based on the size of your TV. Cable, Streaming Service, or Blu-Ray Player The next piece you’ll need for your home theater system is a way to play your favorite movies, TV shows, or sports games. If you have great Internet, you can subscribe to one of the many streaming services available today. If your Internet isn’t that great, get cable, a satellite box, or a Blu-Ray player for your living room home theater. Speakers Next on our list of equipment are home theater speakers. There are several options for this: A Soundbar - In smaller spaces, a soundbar is a great choice. They even have some soundbars with a surround sound feature. Surround Sound Speakers - If you want a truly spectacular audio experience in your living room home theater, you can get a surround sound speaker system. This allows for incredible audio that can make you feel like you’re in a real theater. Just keep in mind that most of the best home theater sound systems with surround sound require a separate audio receiver. See our section on receivers below. Subwoofer - Something that really makes a trip to the theater special is the BASS. A subwoofer is required to deliver the deep audio that movies are known for, like the sound of explosions in an action movie, and create an immersive experience. A subwoofer can be added to any other speaker system to create a high-quality sound. If you really want to “feel” the audio, consider buying two! When it comes to your sound system, here are some of the best sound systems to use: Sony Home Theater Systems Bose Home Theater Systems Samsung Home Theater Systems Dolby Atmos Home Theater Systems Once you have your sound system, you can start thinking about where you want to put it all and the right sound settings to set up. For a true surround-sound experience, place your speakers throughout the space. Home Theater Receiver Many home theater aficionados swear that the home audio system is even more important than the picture. And the receiver is the heart of that sound. A home theater receiver is what will give you a better audio experience at your family or friend movie nights. The receiver splits the audio into many different channels to deliver a surround sound environment and provides power for passive speakers. The most basic of home theater receivers support 5.1 audio, or a system with 5 main speakers and 1 subwoofer. More advanced systems like Dolby Atmos even add height channels into the ceiling. Shop Crutchfield for home theater receivers. Living Room Home Theater Furniture Next in home theater design is the furniture. Your home theater setup wouldn’t be complete without some comfy chairs to sit on, proper lighting, and a place to set your snacks and drinks for the movie. Seating Despite what you might think, you don’t have to purchase expensive leather recliners for your seating, but many seating options will depend on the size and layout of your space. Spacejoy does a great job of breaking this down by type of space you’re designing: Open Living Room - For an open living room, use a single recliner and a traditional couch. You can also shop for a recliner sofa that fits well within a traditional living room space while also providing several guests the option to recline.Shop reclining sofas at Wayfair. Closed Living Room - If you have a closed living room, this is where you could invest in more theater-type seating, which will offer a true movie theater experience.Shop home theater seating at the TheaterSeatStore. Small Living Room - To maximize the space of a small living room, use a sectional that fits well within the space and add some ottomans or bean bag chairs. Lighting A great way to DIY your home theater room is the lighting you use. You can easily add lamps to the room to offer that cozy theater room feel. You don’t want anything too bright; and you’ll want something you can either dim down or can be on in the background without casting a glare on the screen. With this in mind, if you have a lot of windows in your living room, you may want to invest in some black out curtains to prevent a glare on the TV as you watch television during the day. If you don’t want to buy blackout curtains, another benefit of having a living room with a mounted TV is that our pull down TV mounts can tilt whichever direction you need it to go, even if that means away from natural light coming in from your windows. It will just depend on the location of your TV wall mount and the windows in the room. Coffee Table and End Tables Want to prevent spilled drinks and snacks on your living room floor? Add a coffee table and end tables for your guests. If you decide to purchase theater seating recliners, many of these come with cupholders and snack trays you can use. Furniture Arrangement When you arrange your furniture in your home theater space, pay attention to the proper distance and angle of the furniture relative to the screen. Octane Seating explains the viewing distance is often dependent on the resolution of your screen, but they generally recommend a viewing distance of 3 to 5 feet. The higher the resolution of your screen, the shorter your viewing distance should be. Once you have established the right viewing distance for the optimal TV-viewing experience, you’ll want to consider the right viewing angle. Source: Octane SeatingHorizontally, the sweet spot of TV viewing is a 40-degree angle. Place the center of your seating arrangement here and build out from there.Then, consider the vertical viewing angle—or optimal height to place your TV. The screen should be at eye level for optimal viewing. One of the great features of the MantelMount pull down TV mount is that you can easily pull the TV down to eye level so the height at which you mount your TV doesn’t matter as much. Home Decor Your home theater system and furniture are the highest priorities for a living room home theater, but don’t forget about the decor! These are decor ideas you could add immediately or later based on your DIY budget. Some ideas MyDomaine offers that we haven’t already mentioned include: Paint your living room a dark color. Whether you want to paint your entire living room a dark color or just an accent wall or two, this helps bring the focus into your television for a full media room experience. Create a grand entrance. How you execute this will depend on your living room layout. Frame a few movie posters and get a Theater sign. Hang these at the entrance to your living room. If you have more of an open concept, use these same home decor pieces by hanging them around the room. Add a concession stand. If you have a small blank wall on one side of the room, or an awkward corner space you aren’t sure what to do with, create a small concession stand area with snacks and candy guests can grab before the start of the movie. Frame your screen. Another great idea is framing your TV screen so the eyes are immediately drawn to it. You can do that by adding a couple of wall sconces on either side, building a wooden frame to surround your TV, or adding curtains on either side. Add an accent rug. Find a bold rug you can lay down in front of your home theater seating. We hope this guide provided the inspiration you need to create a truly wonderful entertainment space. And don’t forget to get your MantelMount pull down TV mount or motorized drop down and swivel TV mount to make it even more enjoyable.

How to Install a Motorized TV Mount
Do you remember the old days of watching tv? When you had to get up off the couch to change the channel? Thankfully, the invention of the remote control didn’t come long after the invention of the tv, about 1950. Back then, the remote wasn’t a particularly sophisticated piece of technology, It had about four buttons to control the channel and volume and it would make a distinctive “click” noise whenever the user pushed down on one of the buttons. Thus, the origin of the name “ the clicker” you may have grown up with, watching tv as a child. Today, the tv has morphed into something that can sit, sleekly on whichever wall or piece of furniture you chose, or, disappear into a piece of art. TV technology has flourished and now you can control more than just the channel and volume remotely. Yes, many tvs today have the ability to switch between streaming services with a designated button on the remote, but what about adjusting the tv’s position with just one click? Full motion motorized tv wall mounts might be the newest frontier in tv mounting technology. Like a tv lift, with one click of a button, you can lower, raise, and swivel your tv screen to the perfect angle to watch your favorite shows or a nail biting game. Curious to find out more? We have some tips to make sure you can enjoy and relax by watching your favorite shows or movies on your tv, without having to get up to adjust the tv angle. Should You Get a Full Motion Motorized TV Wall Mount? There will always be pros and cons about anything you purchase, including a tv wall mount. For some, a motorized tv mount with a remote might be unnecessary given the amount of sports, movies, and tv shows that they watch. But there are some of you out there that require an even more intricate set up. For those who want an enhanced entertainment experience, or simply want the newest or coolest items and gadgets, a motorized tv mount is an ideal item to have. With a remote control tv mount like our MM815 model, you get the benefits of an articulating tv mount that has vertical travel capabilities — like all MantelMount tv mounts — while also staying put where you are in the room. The MM815 is our newest tv mount and has features never seen before with our mounts. Not only does this motorized tv mount come with a remote control for the tv mount, there are two memory presets on the remote control that allow for ease and quickness in lowering and swiveling the television. Looking for more out of a full motion motorized tv mount like ours? Some more distinguishing features from the MM815 has a visual temperature sensor — that becomes a red color if, for instance you place the mount above a fireplace, the temperature reaches at or more than 110° fahrenheit — as well as our patented centering cams that swivel the television to center while the mount is raising to avoid obstacles like the wall or mantel. Installing a Remote Control TV Mount The installation part is likely the most daunting step of the whole process. However, there are a few options to take into consideration. Like any installation, safety should be at the forefront. Beyond that, ensure that you’ll have the best viewing angle—which is having the bottom third of your screen below eye-level—for everyone in your home. Another checklist item to keep in mind is if you or anyone in your household is handy with things like a tv mount installation project. Or, maybe you or someone else is good with household projects but, like we all know, there’s never enough time in a day. Want to leave it to professionals? There are nationwide home services companies like Ontech (a division of Dish), that install MantelMount's MM340, MM540 and MM700 mounts. If you do end up going at it alone and installing your motorized tv mount, there are still some steps to follow to guarantee that your new mount is secure and ready to be used. Prior to the full installation, take a glance at the main steps of installing the MM815 so you know what you’re in for—especially because the installation process for our mount is different from other motorized tv mount installs. Attach braces to your television. Determine the wall placement of the MM815. Attach the mount to the wall. Note that for the MM815, this step has multiple substeps including powering up the mount, running a system reset to ensure the mount properly works, programming the bottom position, and recalibrating the swivel safety clutch. Attach the tv to the mount. Note that this step requires more than one person. Make your final adjustments. For the MM815, final adjustments include, but aren't limited to, guaranteeing the remote works for the left and right stops by programming the swivel limits, and adjusting the centering cam and side swivel stop positions. Have you briefly checked out those steps? Now you can tackle the installation process. But just in case, here are a few items you’ll likely need to install your motorized tv wall mount: A marking device such as a pencil and/or painter's tape A tape measure A stud finder A manual or electronic level A drill with its corresponding drill bits And your selected tv mount with remote Once all of the necessary installation items are nearby, then the tv mounting process can begin in earnest. To start, mark the area on the wall where you will be drilling the pilot holes. Not sure how high to mount your tv or know where to have the tv and mount placed in the best position in a room? We have answered some of the most common questions here. If you’re able to, secure your tv mount to studs in the wall, or use a drywall anchor when studs aren’t available. Add washers to the end of your screws, and secure the bracket to the wall through the bracket slats. You may need an extra set of hands for the next step, which requires you to line up the tv mount on the back of the tv with the bracket against the wall. Next thing you know, you’ll be comfy on the couch watching tv.